Using Miditrax with Bitwig Studio
Miditrax is not a VST plugin, but it still works smoothly alongside your DAW. Here is how to set it up in Bitwig Studio.
How it works
Miditrax sends its drum notes to Bitwig over a virtual MIDI port, and can follow Bitwig’s clock too. With sync on, Bitwig is the master clock, so Miditrax starts, stops and stays in time with your project, playing whichever drum instrument you load on a track.
The example below uses Bitwig’s own Drum Machine, but any drum VST works, and so does a drum machine or other hardware connected to your computer.
Microsoft Windows: create a virtual MIDI port (skip this part for macOS)
A virtual MIDI port connects one music app to another, here Miditrax to Bitwig. Windows does not include one yet, so install the free loopMIDI app to create it. On a Mac, use the built-in Midivex Virtual port wherever the steps below say “Miditrax”.
Install loopMIDI
Download and install loopMIDI by Tobias Erichsen.
Add your port
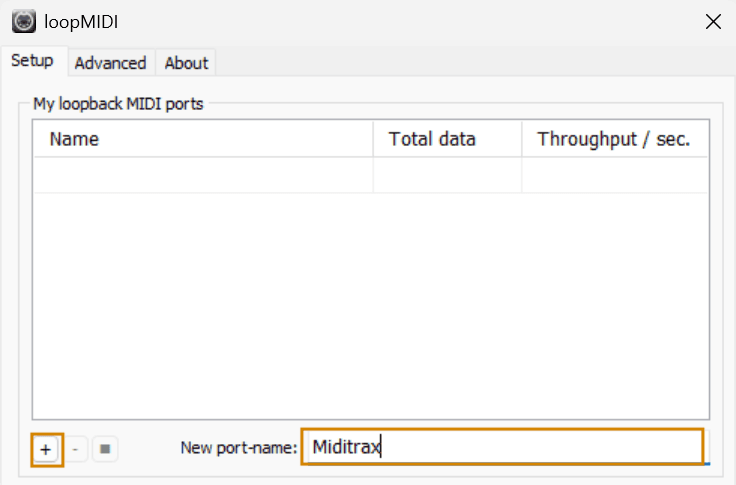
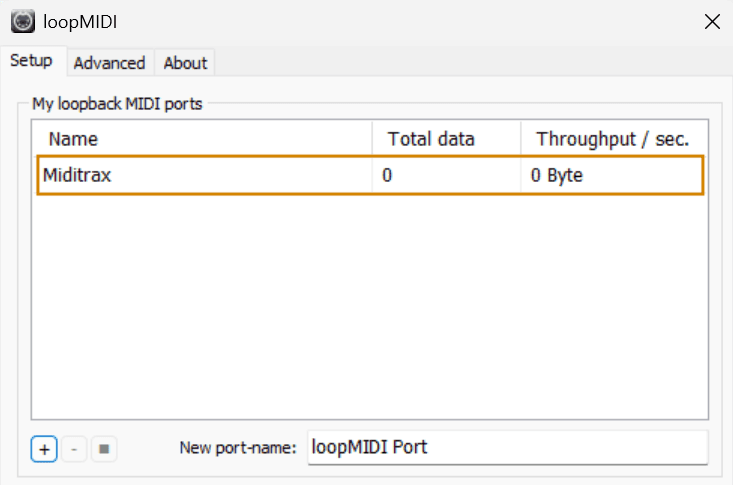
In loopMIDI, type a name in New port-name (we call it Miditrax, but any name works), then click the + button in the lower left corner. Your port appears in the list, and shows up in Miditrax and Bitwig as a MIDI device.
Miditrax settings
Set the MIDI output
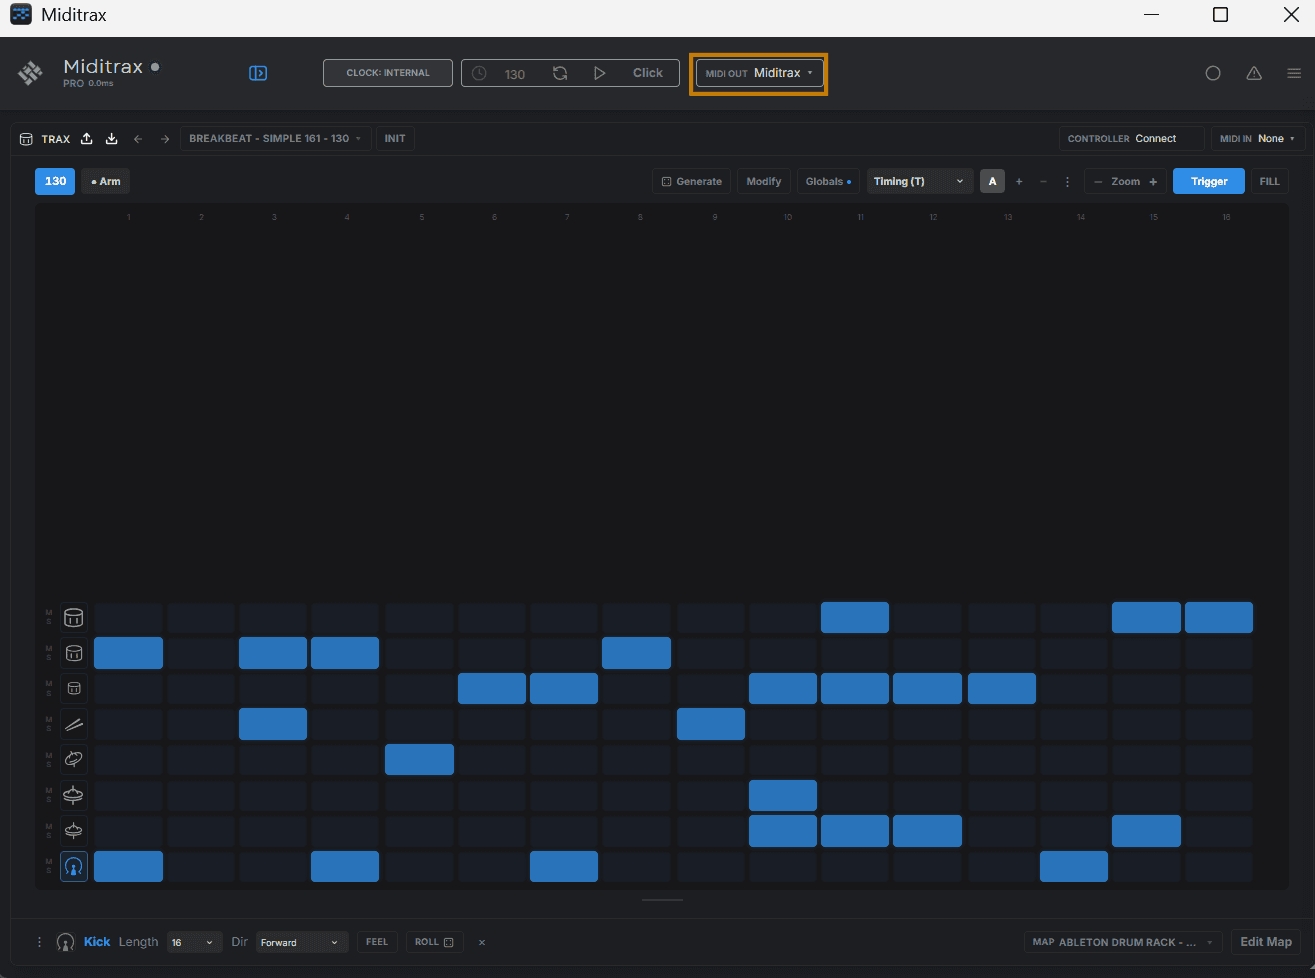
In the top menu, set the MIDI Out to your virtual port (Miditrax, or Midivex Virtual on a Mac).
Bitwig setup
Open the Bitwig Dashboard
Click the Bitwig logo at the very top centre of the window to open the Dashboard.
Set the virtual port as a controller input
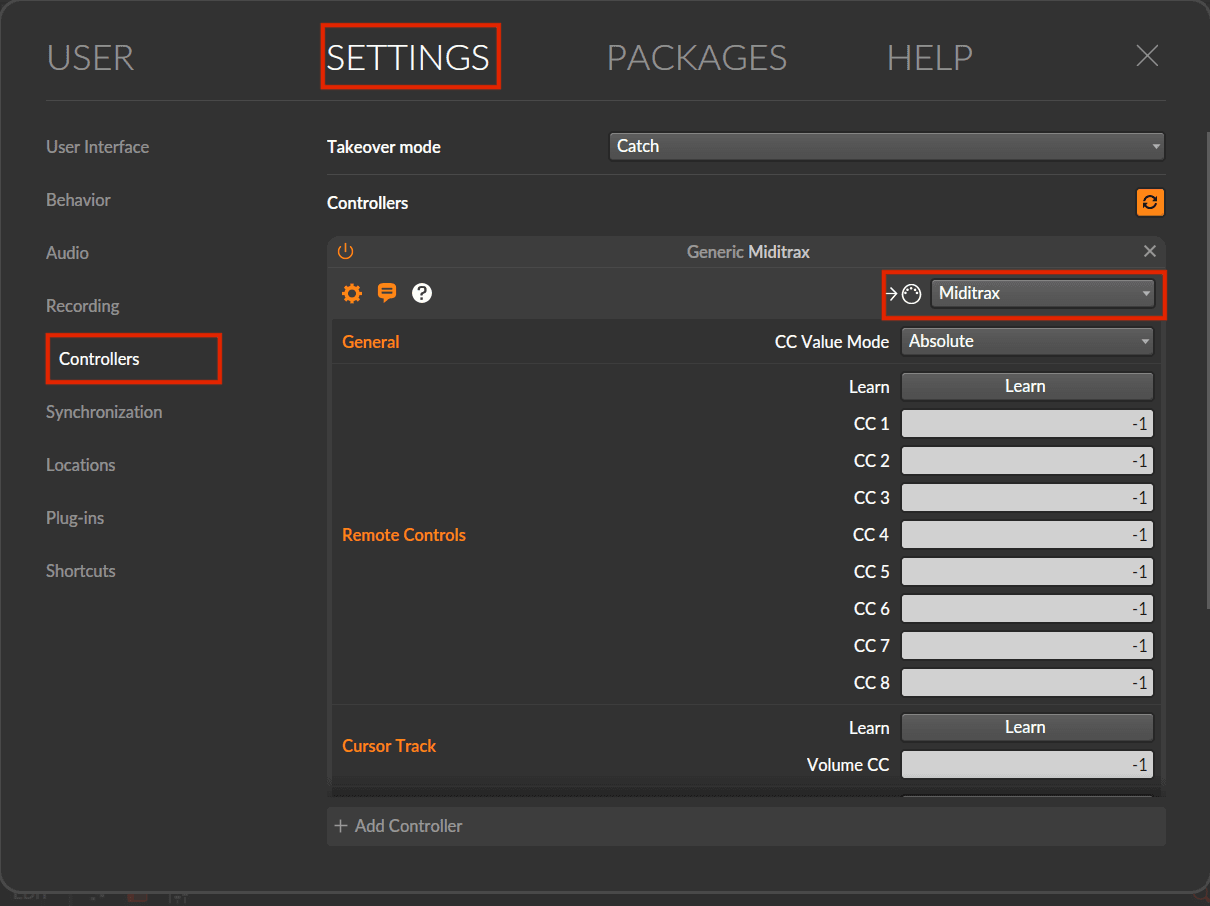
Select Settings at the top, then Controllers on the left, and set the MIDI input to your virtual port (Miditrax). If the port is not listed, or Bitwig does not pick it up, restart Bitwig.
Add a drum instrument
On an instrument track, add a drum instrument and pick a preset. In this example we used Bitwig’s Drum Machine with the Berlin 512 Kit.
Check the track’s MIDI input
You can leave the track’s input on All Ins, or set it to Miditrax, Channel 10, to take only what Miditrax sends.
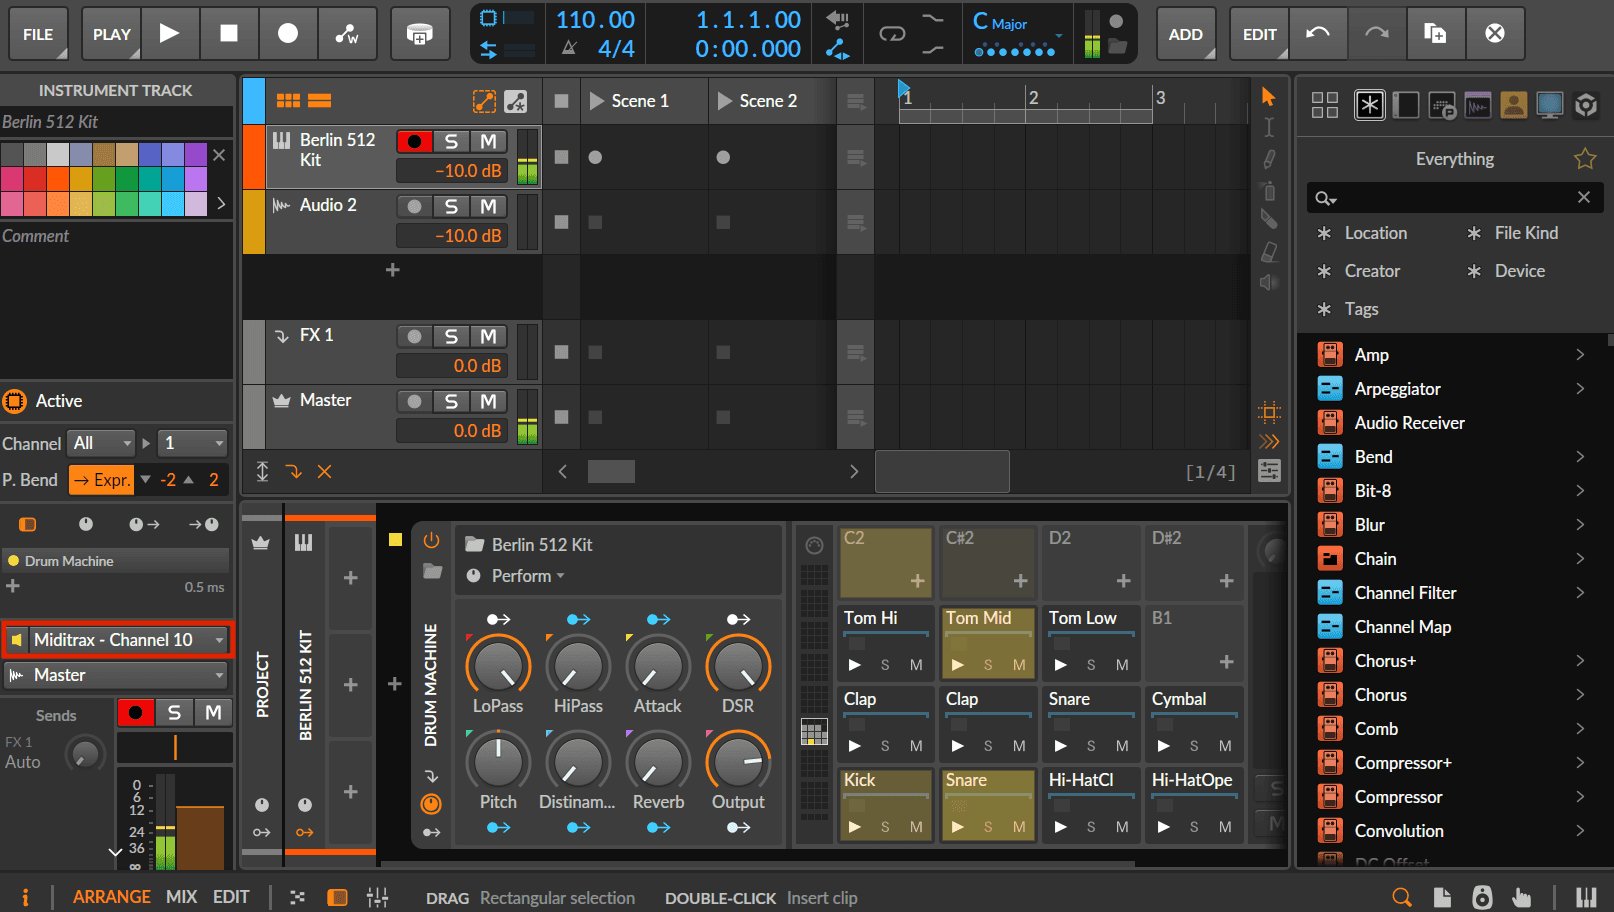
You can now hit Play in Miditrax (or on your connected MK3, MK2 or Mikro controller) and it plays your Bitwig drum track.
Clock sync (optional)
To have Miditrax start and stop with Bitwig, make Bitwig the master clock.
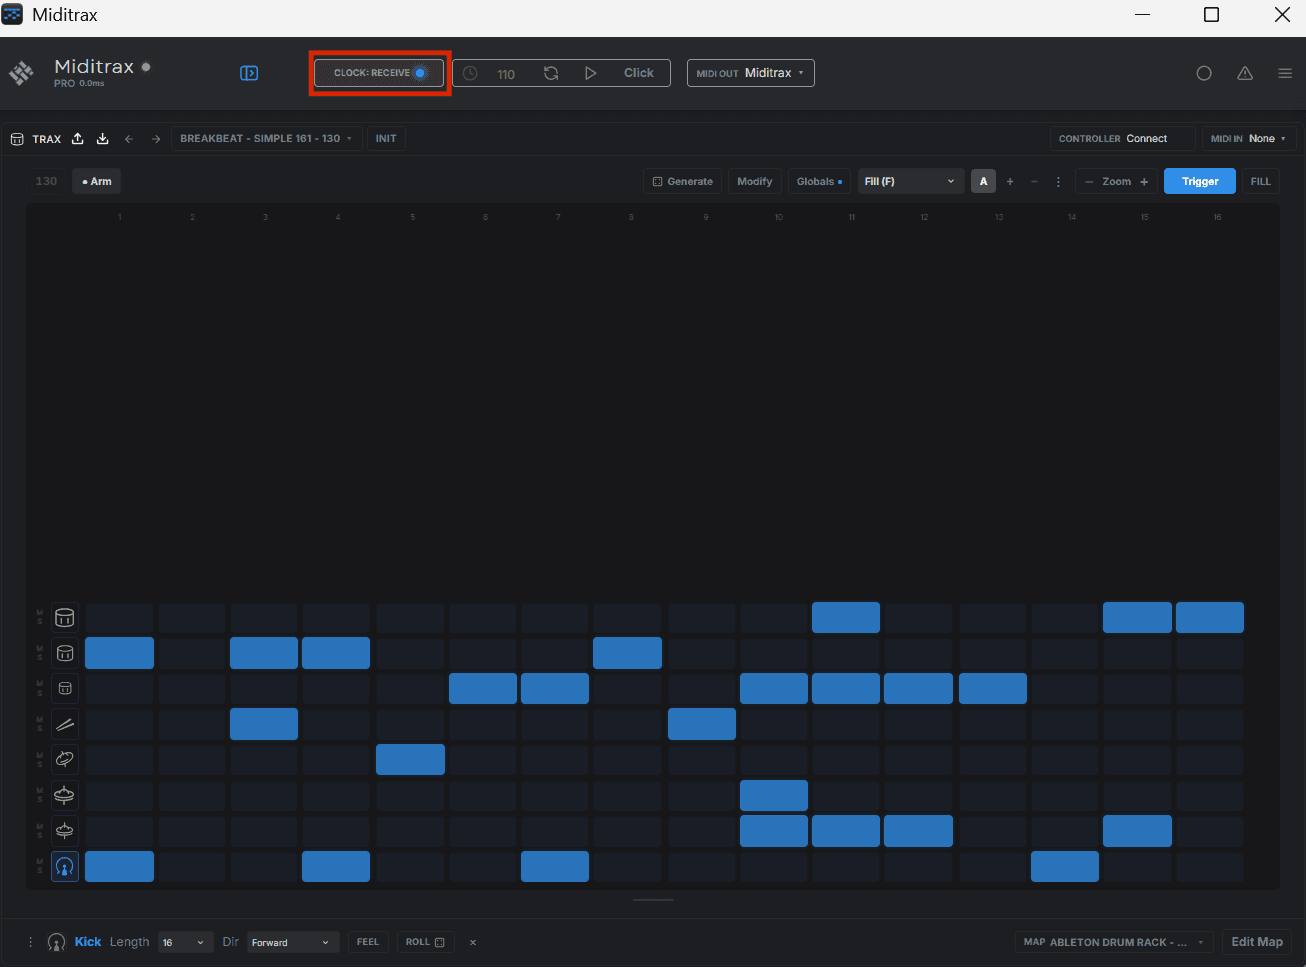
Set the Miditrax clock to Receive
In Miditrax, click the Clock button in the top menu until it reads Receive.
Send clock from Bitwig
In the Bitwig Dashboard, select Synchronization and, under MIDI Sync (OUT), turn on the clock for your virtual port.
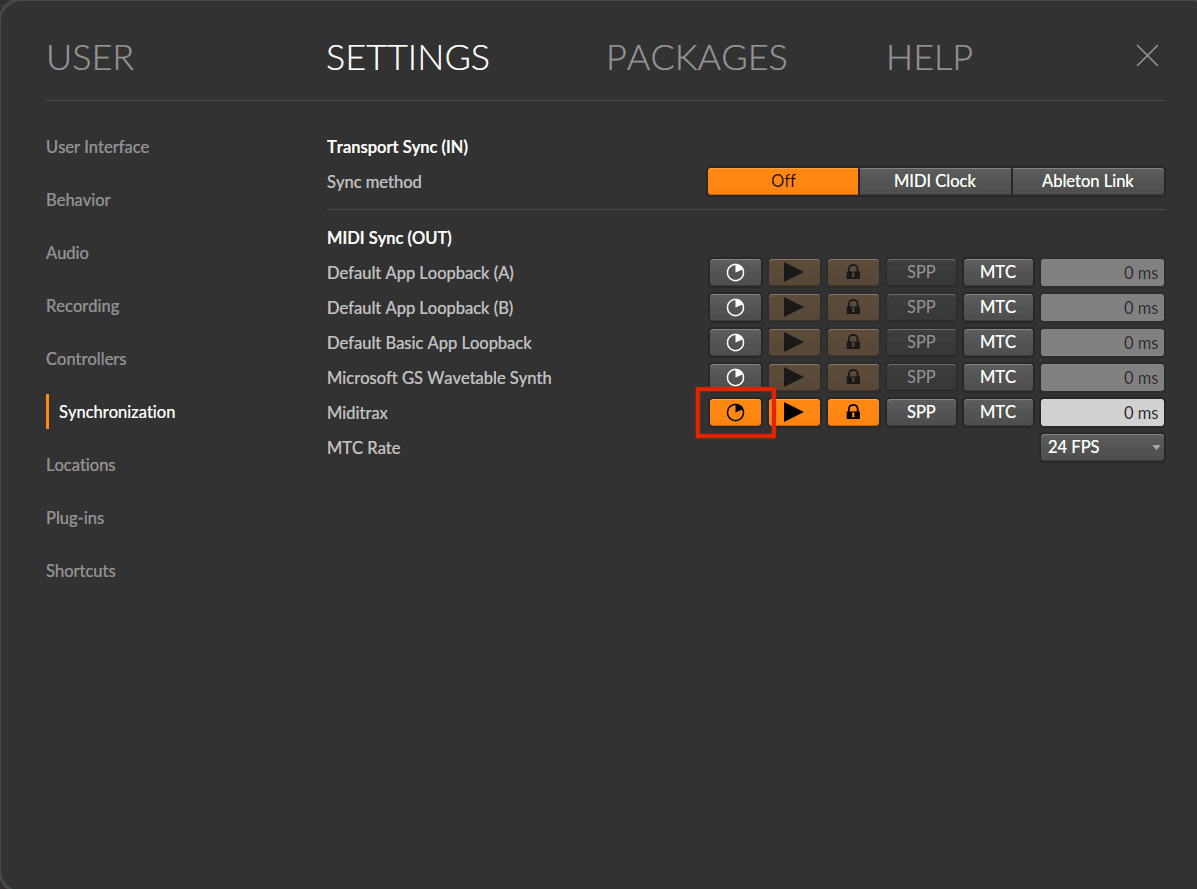
You can also do it the other way round and make Miditrax the master: set its Clock to Send, and set Bitwig’s Sync method to MIDI Clock.
Playing and recording
With clock sync on, starting Bitwig’s transport starts Miditrax too, playing your drum instrument in time. Arm the Bitwig track to record the MIDI onto it, or, if you prefer, use the MIDI Export button in Miditrax and drag the MIDI file onto your Bitwig track.